Showing posts with label Art. Show all posts

Mar 26, 2013

Artist Feature: Laura Wooten

hi!


I have a cold.  I am super stressed about this house situation.  And my cough drops are running out.  What is  a girl to do?  Be inspired by art of course!  I found this artist when searching for an image for flashlight tag for my Flashlight Tag post over at QTO.  Here is the image I found:


So cool right?  I looked up the site and found the coolest project by an artist Laura Wooten who was a Brooklyn city girl and now living in the suburbs in Orange, VA.  Basically for the year of 2012 she took all of her little drawings and sketches throughout the week and collaged them into a 12x12 piece using paint and other mediums.  All the pieces will hang together as one piece to reflect her life in the suburbs.  One is called Flu Season, one is called Christmas Tree, out of town visitors, Balloon Ride and Homework.  I love this one called Out Of Town Visitors.


This one is entitled Friendship:

 
And then this piece - Flashlight Tag - which led me to this awesome artist in the first place.  

 
I mentioned that this was inspiration for me.  I think these kinds of pieces would make wonderful illustrations for a children's story book.  I have had an idea for a children's book that I have mulled over for years.  One time I started writing down the words but didn't get very far.  Hmmm...now that I have some images in mind, maybe the project will come to fruition?  One day???
 
You can find all about Laura's project on her blog here:  http://blog.laurawooten.com/.  If you live near Orange, VA - check out her exhibit!
 
~ Sarah


Nov 8, 2012

Exhibit Spotlight :: MORE or LESS at the Albany Airport

MLPostcard
 
"At this time more than any other, we are mindful of what is plentiful and what is scarce; of what some have and others don't. In life, the pursuit of more necessitates the apportionment of less. In art, these opposing qualities find connection through their ability to impart the sublime, whether through lavish profusion or bare simplicity."
 
One great thing about traveling in airports is getting to see the revolving art exhibits many airports have for travelers and the general public alike.
 
The Albany airport did not let me down!  They have a great exhibit right now called More or Less that I wanted to share with you. 
 
Here are some of my favorite pieces...
 
This actually reminded me of textiles with the over all pattern.
 

Look how detailed they are close up!


This is actually scraps of paper molded into cubes on wooden tables.  I am going to be honest, I don't really get art like this.  But interesting nonetheless!

 
McDaniel
 
Nilsson
 
Takenaga
 
Carson

These last two were actually not part of the exhibit but were featured in another area of the airport.  They are by an artist named Robert Cartmell.  I LOVED these pieces.  What can I say?  I love things that are bright and colorful.


This one was my favorite...if it were for sale and the price was right, I would have seriously considered buying it. 

 
Art is a wonderful thing.  Creating it makes me a different person and brings me peace.  I love seeing every one's talents come to life in a piece.  Even if it is something I don't understand, I can appreciate it.
 

May 14, 2012

Finished Painting: Title Suggestions?


I am so excited that I painted a painting this weekend for the MDA Silent Auction!  You are not supposed to paint from a picture but trying to paint on location during nap time was not possible.  So I selected this scene from the back of my Southern Living.


Like in every painting, I started with the usual suspects - primaries and white.


Then I mixed my colors.  Usually you are supposed to just do 5 piles (and then modulate later) but for this I did 8 and a few more more later.


I love this light periwinkle blue and how it looks near this happy butter cream yellow.


I also loved this deeper blue.  At this point I was thinking HOLLA - this just might be a good painting!


So then I started painting and hit a bit of a problem.  You see my under painting was too thick and was not dry.  So I needed to lay on a lot more paint...otherwise my sky was going to be orange.  So I literally smeared a ton of white paint straight from the tube on the canvas.  Then I modulated from there.  It worked!  Whew!

This was as far as I got before Reed woke up from his nap.


So I pulled him outside in the exersaucer and kept working.

I got to this point and was loving the sky and the water.  But the trees were needing something.  Reed was getting a little bored so I stopped working to wait for Rudy's opinion.  He was due home from work in an hour or so.  He is good to look at my pieces objectively mid-way through and give me suggestions.


When Rudy came home we determined to modulate the trees much further by varying the lights and darks as well as adding some more dimension to the water. 

This is what I ended up with!  So excited!  So I need a title for this one.  Sometimes titles for paintings are so cheesy.  I just try to go with what something is but hitting a mental block.  What would you name it?  Any suggestions?


Because I globbed on the white paint, it is going to take more than a few days to dry.  I am going to leave a fan on it for several days straight in hopes of getting it to dry faster.  Eek!  I hope it dries in time! 


Does anyone know of ways to get paintings to dry faster?  If so please share.  Stay tuned for the official title and finished piece framed and ready for the auction!  

May 11, 2012

Underpainting


I have begun my work on the piece for an MDA (Muscular Dystrophy Association) silent auction fundraiser.  I haven't picked what I am going to paint but I did want to go ahead and do my underpainting to get my canvas ready.

Underpainting serves a couple of purposes for me.  Mainly by painting the entire canvas a warm tone such as orange or red, it makes the colors I put on top of it warmer and more alive. 

It also takes away the intimidation that a stark white canvas can give you.

It is very basic - I just put a little red and yellow on my canvas and mix it up and then paint the entire canvas.  I try to go more red than yellow because I think my paintings turn out better.


I will let this dry through the weekend and start my painting on Sunday.

I already have a frame and everything!  These plein air style frames can be purchased at Michael's or www.pictureframes.com.  They are perfect for canvas boards.


Have a great weekend and I hope to have a good finished painting to show you on Monday!  Fingers crossed!

May 1, 2012

Supper Club - Paintin' and Drinkin' Party

After I had so much fun at Wine and Design here in Charlotte aka Sips and Strokes or Paintin' and Drinkin' as I like to call it, the girls in my supper club wanted to do it too.  So we thought it would be fun to do it one night instead of our traditional gathering.  But at $35 or $45 a person and not having the ability to really eat a good dinner, we decided to create our own by me teaching the painting I learned.

So I picked my menu (make your own tacos) and got the house ready.  I served chips and salsa and veggies and hummus for appetizers.  We started out with wine and margaritas inside and then moved outside to paint.


I purchased 12x12 canvases at Michael's and inexpensive craft acrylic paint.  We made our "palettes" on paper plates from the dollar store and got to painting!


Everyone had a really good time!  And they all turned out awesome!


After painting we had dinner by candlelight!  It cooled off and there was a nice breeze.  It was just lovely!


Here we are showing off our art! 


Sweet Rudy not only got Reed down for the evening while I got ready for the party but he also cleaned up when he got home.  I have the best husband!

Great evening!  Can't wait to see the girls again!

Apr 30, 2012

First Beach Painting - Carolina Beach, NC

So we had a fun trip to Wilmington to visit Karen and Mike.  We showed up with a car full of stuff ready to relax at the beach.  We spent the day on Saturday at Carolina Beach just outside of Wilmington.  Reed loved the sand!  He had a great time playing.  He was in awe of the sights and sounds.  It was so cute.


I even managed to do a little painting. 


This was my first time painting the beach.  I feel it is a success beacause 1.  I actually painted and 2. you can tell it is the beach.  It was nice to capture the day.  I do want to paint some of people at the beach but I think I might have to - dare I say it - paint from a picture.  I know you aren't supposed to do that but that is the only way I think I will be able to do it.


I didn't get any pictures of Karen's house...not to make excuses but I get all of track when Reed is around.  Hoping she reads this and sends me some... :)  It looked GREAT! 

Apr 12, 2012

Repurposing Store Bought Art Frames


My mother-in-law found these lovely children's prints at a yard sale for $2 apiece.   I think if I had a little girl's room, they might have worked but I was more interested in the frames and mats.  Repurposing frames like this is a great way to get decent frames for your photos without spending a lot of money.

The first thing I did was remove this hardware.  This slides up and down...I think it might have been a way to attach a ribbon?  Not sure.  Was happy to see that removing it did not affect the sawtooth hanging piece.


Then I took a pair of scissors and ran it down the space between the cardboard filler and the frame to reveal the framing staples.


I removed the art work and then put photos of Reed in.  Easy as that!  I would have backed the frames again using brown paper and glue.  But I wanted to leave it open in case I wanted to change the photos at some point.  Good thing too because after looking at this for a few days, I think I already want to make a change!  More on that later!

Here are the photos...I know I am partial but what a cutie!  My husband took these.  He is a great photographer.  www.rudyhayden.com

I hung them over our dresser in our bedroom.  I think I am going to hang more of just Reed's face in the frames on the right and get additional 8x10 frames to hold the photos of me and Rudy on either side.

Mar 14, 2012

Yeah...so painting canyons is hard...

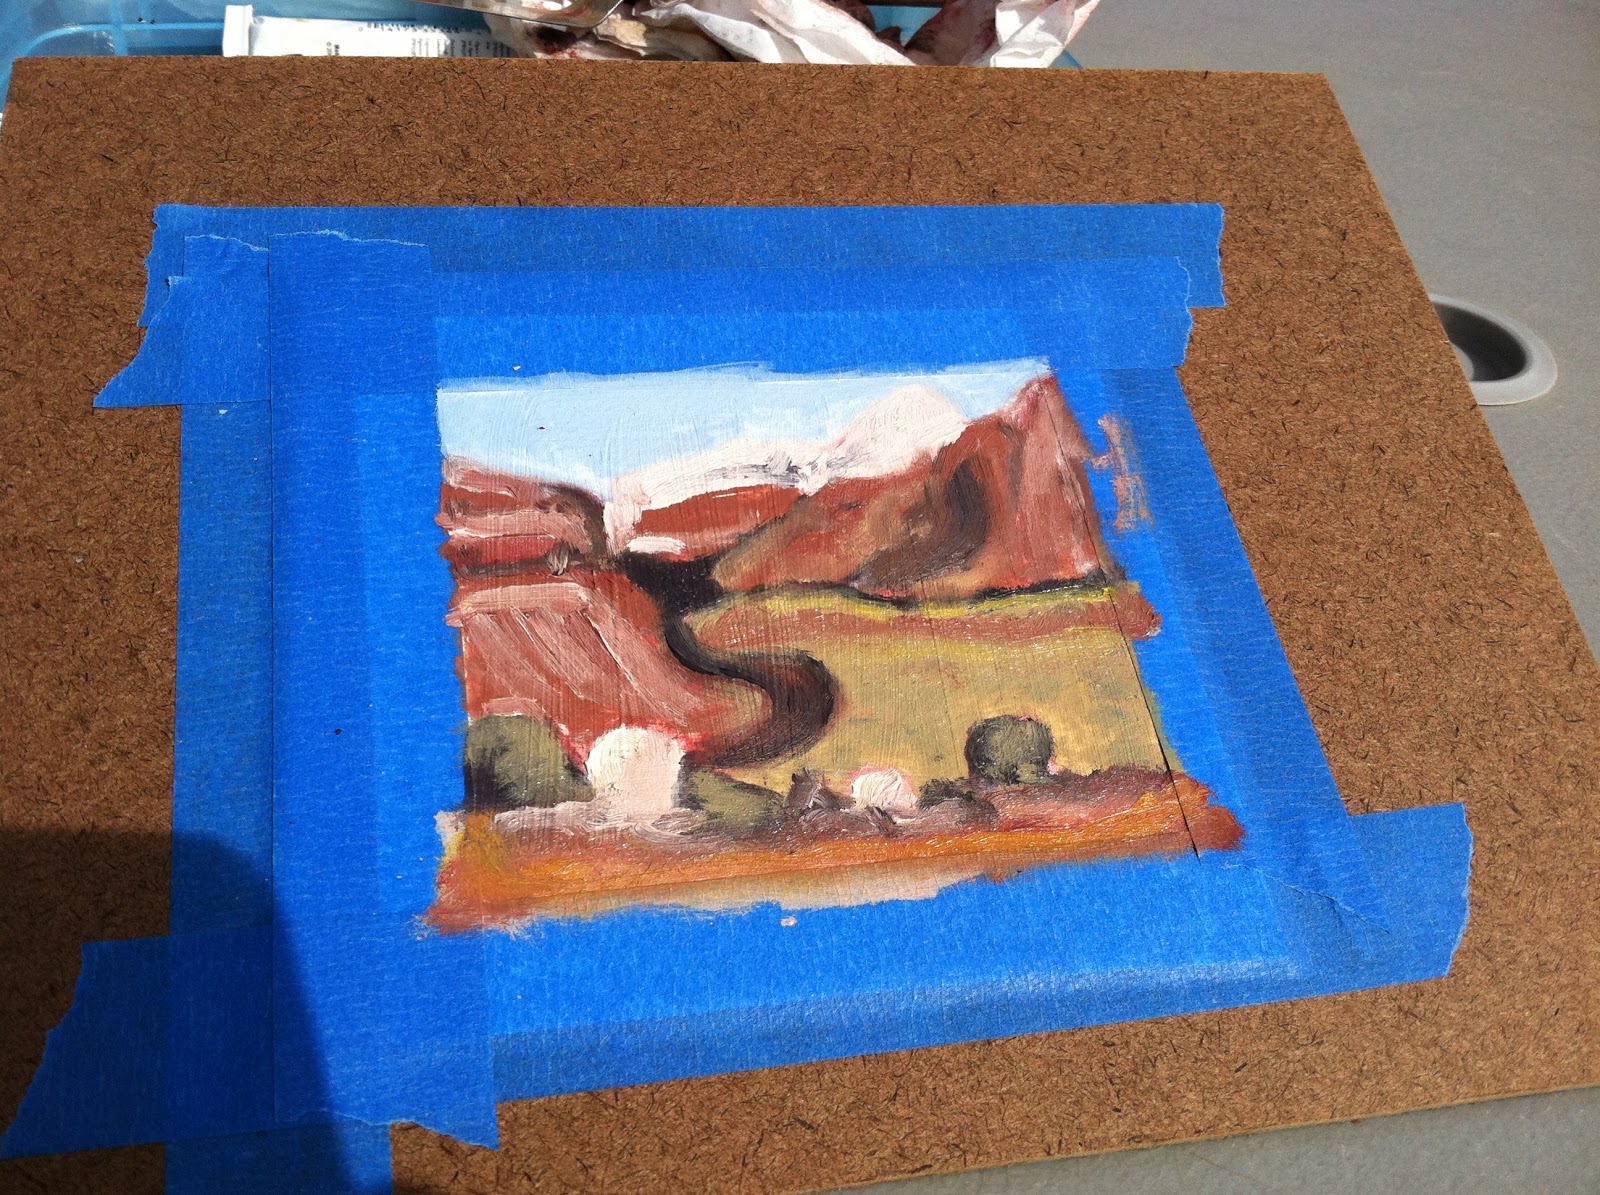
I set out to paint in Zion and had success in that I actually painted but the paintings didn't turn out very well.  Painting canyons is hard!  Especially when you haven't painted in months.  But here is the thing.  If I want to paint a good painting, I will have needed to paint 4-6 paintings before it.  I just need the practice.  So although, these did not turn out very well, they will mean that I will probably paint better in the April Workshop I am attending as well as a painting trip I have scheduled in Wilmington, NC at the end of April.  I am hoping to have one 12x16 piece to donate to the MDA auction as well as paint a few pieces for my friend Karen for her new house in Wilmington.

Fingers crossed that these duds will pave the way to some winners next month!

Here are the details of my painting adventure in Zion!


I started out by not going very far from the hotel room. Our hotel Flanigan's Inn has an awesome labryinth atop a small canyon on the property. I hiked up there and was pleasantly suprised to find a picnic table.

They lead spiritual journey things up here.  I am not sure what these stacks of rocks are but I think they are related to that.


Here is the view I was going after.


Here is my very basic set up.  Love the simplicity!


When I paint I use the rule of thirds a lot.  I try and put my focal point in one of these areas - making the dots helps me stay on track.


Then I draw out my painting using red or blue.  Usually I do some red/orange underpainting.  But didn't do it on this trip.


For color, this is what the sky initially started out as.  I work to make colors from some combination of the primaries.  I always start with white for the sky and rarely start with it for any other colors in my painting.  I make 4-5 piles of paint of the main colors in my painting.


I used the piles below to block in the basic shapes for this painting.


Then I modulated...upon realizing this wasn't going to improve.  I stopped where I was and ended painting for the day to join Reed and Rudy in a sunset hike and picnic at Kolub Canyon.


Here we are...it was cold but beautiful!


The next day Rudy headed to Bryce Canyon and I stayed back to paint.  Because I had the little guy, I opted to paint from our deck.  There were several views to capture and I could make the most of my time between naps.


Painting 2 - looking a little more canyon-esque.


Painting 3 - I called it quits after this one.


It would be easy to be disheartened when your paintings do not turn out very well.  But as I said, I have to paint 4-6 so so ones to get a good one.  It is just how it is.  I can't wait to pick up the brush again!


Related Posts Plugin for WordPress, Blogger...