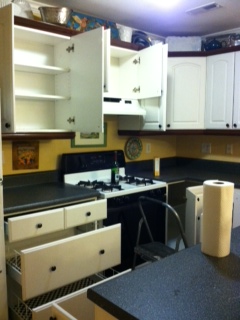
Here is what my kitchen looked like before I started. One of the best things I did was remove the microwave. I wish I could say I had a neat way to still keep it but keep it off the counter but I do not. It will be given away.
So here is the step by step to what we did to get my kitchen organized. Pretty reveal coming tomorrow!
1. First I removed everything from all cabinets and drawers. This is everything that was in my kitchen...I can't believe it!
Then I wiped down all surfaces with bleach cleaner and was left with this sparkling empty shell to work with. Funny how my kitchen seems so much bigger without anything in it!
Pretty much every drawer and cabinet were empty of dividers or kind of organizational element with the exception of one corner cabinet. Rudy and I put in the lazy susan several years ago. It is handy but a little awkward to get things out of.
2. Next I grouped contents by category such as pantry, baking, gadgets, spices, food storage, etc. I made a pile for things I never use to go to charity and a pile of things I use rarely and wanted to keep. These items will have to be stored elsewhere in my house to pull out on those rare occasions.3. Then we went back in the kitchen and determined where to place things based on access. We put things I use often in easy to reach places. The things I didn't use very much were tucked away in the corner cabinets or in the back of a cabinet.
I didn't move my glasses and plates because my plates will only fit in the corner cabinet and my glasses work for me where they were.
4. After that, we determined the types of containers and dividers we needed for the space. We knew we needed more storage trays for utensils and cooking gadgets as well as baskets or containers to hold Reed's things and odd sized food items. We started by putting almost everything in the drawers to get a feel of what we were working with. I measured the spaces and wrote them down.
5. We went to our local organization retailer (we used The Container Store) armed with our measurements and somewhat of an idea of what we were looking for. It did help that I had scouted out their website before hand. We went out to lunch. Reed had fun sitting at the "big boy" table. This was his first time in a restaurant high chair!
6. We made our purchases and placed in kitchen. I had to go back to make a return of somethings before finding the right pieces. Because we did such a good job of organizing and getting rid of things I actually had a place for the items I don't use very often as well as space to bring back up some items I had stored in the basement. Very excited about that!
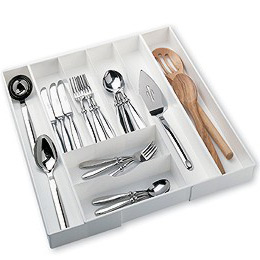
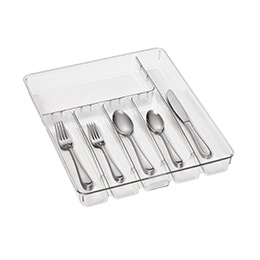
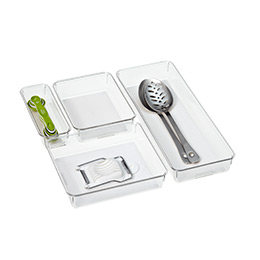
Here is what we ended up with from The Container Store.
Expand-A-Drawer Cutlery Tray - on SALE $12.99
Madesmart Cutlery Tray - $14.99
Madesmart Drawer Organizers - $1.99-$5.49
Freezer Storage Basket - Small - $5.99
Linus Divided Cabinet Organizers - On SALE $5.99
White Melamine Shelf - $12.99
(This looks identical to my shelves...once my neighbor cuts it down the right size, my cooking and spice cabinet is going to be money!)
In total, I spent about $130...I know it sounds like a lot. But I think it was worth it to get my kitchen up to snuff. There are three plastic bins very similar to the Linus Divided Cabinet organizers that I purchased in the bath section. The label reads Bath and Vanity Organizer. I cannot find them on the website but they were about $6.99 apiece. I think I may return them and look for something at the Dollar Store instead. That would save some money. Other than that I think everything was well worth the effort and money I spent.
I just have to put the finishing touches on the space...can't wait to show it off tomorrow!


No comments:
Post a Comment
Note: Only a member of this blog may post a comment.